


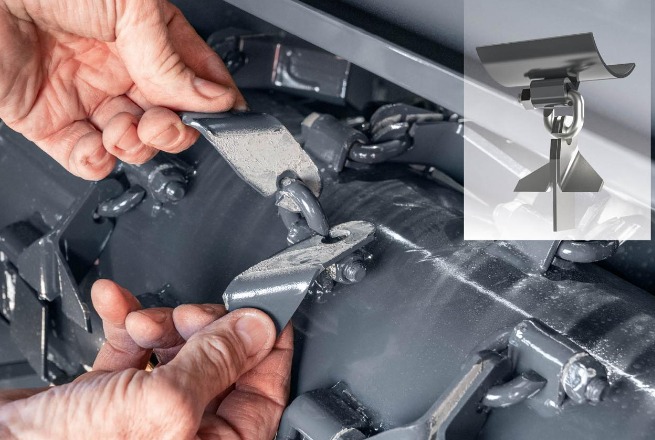
Replacing flail mower blades may seem like a straightforward maintenance job, but small mistakes can affect how the mower operates. Choosing the wrong blade specifications, reusing worn mounting hardware, or installing blades incorrectly can lead to vibration, uneven cutting, or premature wear. In some cases, the problem is not with the new blades themselves but with how they were selected or installed. Knowing the most common mistakes can help you avoid unnecessary problems when replacing your flail mower blades.
Choosing Blades Based Only on Appearance
One common mistake is choosing a blade because it looks similar to the one already installed. When selecting flail mower replacement blades, you should check the specifications required by your mower rather than relying on appearance alone.
Important details include:
- Blade size and thickness: The replacement should match the dimensions required for your mower.
- Mounting hole: The hole size and position need to work with the existing mounting system.
- Mounting arrangement: Check how the blade attaches to the rotor and holder.
- Blade weight: Significant differences in weight can affect rotor balance.
- Overall configuration: The blade shape and design should be suitable for the mower and its intended use.
A blade that looks almost identical may still be unsuitable if these details do not match. Checking the specifications before ordering can help prevent fitting problems and unnecessary replacement work.
Replacing Blades Without Checking the Mounting Hardware
Another common mistake is replacing the blades while ignoring the parts that hold them in place. Before installing new blades, inspect the bolts, pins, holders, and mounting holes for visible wear or damage.
Worn or damaged hardware can allow a blade to move more than it should during operation. This may cause:
- Blade looseness: The blade may not stay securely in its intended position.
- Uneven wear: A blade that moves abnormally can wear differently from the others.
- Vibration: Loose or poorly secured blades can affect rotor balance.
- Mounting problems: Damaged holders or mounting holes may prevent the new blade from sitting correctly.
Installing new blades does not fully solve the problem if the components supporting them are already worn. Check the complete mounting assembly before putting the mower back into operation.
Installing the Blades in the Wrong Position or Orientation
Even the correct blade can cause problems if it is installed in the wrong position or orientation. Before removing the old blades, take a few photos of how they are mounted. This gives you a simple reference when installing the new ones.
Pay attention to:
- Blade orientation: Make sure the blade faces the correct direction according to the mower’s design.
- Mounting position: Install the blade in the correct position on the rotor rather than placing it wherever it appears to fit.
- Blade arrangement: Keep the same arrangement as the original setup unless the mower’s instructions specify otherwise.
Do not rely only on how the blade looks during installation. Following the mower’s recommended setup can help prevent uneven cutting, abnormal wear, or other problems after replacement.
Mixing Different Blade Types or Weights
Using different blades on the same rotor can create an uneven setup, especially when the blades have noticeable differences in type, size, or weight. This does not mean that every partial replacement will cause a problem, but you should avoid mixing blades unless the mower is designed for that configuration.
For example, combining new blades with heavily worn ones can create differences in weight and condition. Different blade types may also have different shapes or cutting characteristics. Depending on the mower, these differences can contribute to:
- Rotor vibration: Uneven blade weight can affect rotor balance.
- Uneven cutting: Blades may not interact with vegetation in the same way.
- Uneven wear: Some blades may experience more load than others.
- Additional stress: An unbalanced rotor can place additional load on related components.
Before installing a mixed set, check the mower’s requirements and make sure the blade arrangement is appropriate.
Ignoring the Rotor During Blade Replacement
Replacing the blades is also a good opportunity to inspect the rotor and the parts that support them. If the rotor or its components already have a problem, installing new blades may not fix vibration or uneven cutting.
Before installing the new blades, check for:
- Visible damage or deformation: Look for anything that could affect the rotor’s normal rotation.
- Material buildup: Remove accumulated grass, soil, or debris that could affect balance.
- Worn blade holders: Check the holders for excessive wear or damage.
- Uneven wear: Differences between mounting positions may indicate an underlying problem.
Taking a few minutes to inspect the rotor can help you identify problems that might otherwise be mistaken for blade issues. New blades work best when the components supporting them are also in good condition.
Failing to Check the Mower After Installation
Another mistake is putting the mower straight back into normal work without checking the installation. After fitting the new blades, take a few minutes to make sure the mounting hardware is secure and the blades are installed consistently. Also check that the rotor can turn normally and that nothing appears loose or out of position.
If possible, start with a short, low-load test and pay attention to any unusual vibration or noise. Then check the cutting result. If the mower does not operate as it normally does, stop and inspect the blade installation before continuing with regular work.
Replacing Only the Damaged Blade Without Checking the Others
Finding one damaged blade does not mean you should replace it without checking the rest. Before installing new replacement blades, compare the other blades for wear, damage, weight differences, and mounting condition.
If several blades are heavily worn, replacing only one may leave the rotor with significant differences between blades. You do not always need to replace the entire set, but checking all blades first helps you decide whether replacing one or several blades is more appropriate for your mower.
Conclusion
Replacing flail mower blades is more than removing the old ones and installing new ones. Taking a few extra minutes to check the blade specifications, mounting components, rotor, and installation can help you avoid problems after replacement and keep the mower working as expected.
